BLOG & NEWS
Home
-
Blog & News

When choosing screens for precise tasks in places like medical and industrial settings, OLED tech gives clear edges over regular LCDs. A big difference is the contrast level. OLED displays show pure blacks since each pixel lights itself. LCDs, though, need a backlight. This leads to a strong contrast level, vital for good visibility in low-light spots often seen in medical checks or industrial control boards.
Response speed is another strength for OLEDs. Their quick pixel reaction means OLED screens can show fast data without blur. This helps in busy places like medical imaging or factory automation. Plus, OLEDs use less energy than LCDs since they skip a steady backlight. This power saving is great for mobile uses or devices running nonstop, like patient tracking systems or industrial dashboards.
OLED displays beat traditional LCDs in staying strong, making them perfect for tough industrial or medical spots. These screens handle temperature swings and shakes better. Both can harm how an LCD works. In places where gear faces changing heat or physical strain—like a factory floor or portable medical tool—the toughness of OLED screens keeps them reliable over time.
Also, OLED displays deal with glare better than LCDs. With self-lit pixels, OLEDs keep things clear and easy to read even in bright light. LCDs often struggle with this. This trait makes OLED screens a smart pick for uses needing visibility in mixed lighting, like outdoor medical kiosks or industrial control panels.
For medical and industrial jobs, touch response is key to making work smoother. In clean medical spaces or when users wear gloves, tweaking the OLED touch screen matters. It ensures exact and quick input. One way to improve this is by adjusting touch settings in the Raspberry Pi’s system. Using capacitive touch tech also allows smooth use with gloves on. This is critical in medical areas where cleanliness rules.
For industrial tasks, the screen’s touch should work well in dry or wet settings. Tuning the sensitivity stops false taps from stray touches or weather factors. This lifts the user experience. Proper tweaks keep touch input spot-on in tough conditions. That’s vital for steady operations and fewer mistakes.

When hooking up an OLED display with a Raspberry Pi, choosing the right link is key for fit and function. Raspberry Pi models like the Pi 4 and Pi 5 give options like HDMI, DSI (Display Serial Interface), and LVDS (Low-Voltage Differential Signaling). HDMI is the go-to choice. It’s widely supported and simple to connect. But DSI suits smaller setups. It handles higher resolutions and faster data with fewer pins.
For industrial or medical needs with high detail and low power use, LVDS works well. It gives top signal quality over long cables. It’s great for OLED displays in spots with lots of electrical noise. The best link depends on needs like resolution, space limits, and factors like interference.
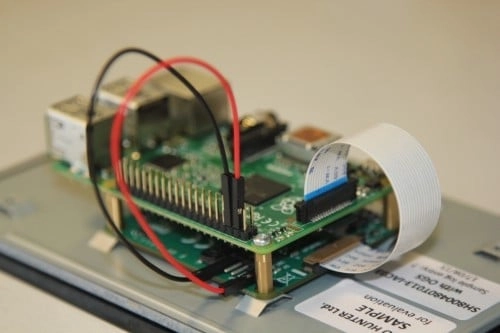
Once you pick the link, next is wiring the OLED display to the Raspberry Pi. Start by checking the power supply. OLED displays can pull a lot of current, especially when bright. Depending on your setup (HDMI, DSI, or LVDS), connect the right cables from the Pi to the screen.
After wiring, adding the needed drivers is a must. This might mean updating the Raspberry Pi’s core system to support the OLED display. Or you may need specific software to link the screen and Pi. Watch out for GPIO clashes, especially with other add-ons on the Pi. A common slip is missing the step to set the Pi to see the display right. That can lead to blank screens or wrong sizes.
Medical and industrial jobs often need high-detail screens for things like medical scans or HMI (Human Machine Interface) control boards. When setting up an OLED display for these, tweak the size settings to fit the task. For example, detailed scans like CTs or X-rays need sharp visuals. So, pick and set a higher resolution screen.
The Raspberry Pi’s config files let users adjust the display size. This ensures content fits well on the screen. In medical spots, size settings should boost image clarity and avoid twists that could hurt diagnostic truth. For industrial panels, size tweaks may be needed to keep user layouts clear and useful at a glance. This helps quick choices in high-stress settings.
A challenge with OLED displays outdoors is keeping them visible in direct sun. Sunlight-readable OLED displays use anti-glare coatings and brighter settings. These keep content readable even in strong light. For medical kiosks outside—like for health checks or info sharing—adding these traits ensures users get key info without the screen fading in sunlight.
Besides upping brightness, OLEDs with higher contrast levels improve visibility in changing light. This is handy for outdoor medical tools where exact info must show in varied lighting.
Pairing touch screen OLED displays with Raspberry Pi IoT (Internet of Things) systems opens tons of options for medical and industrial uses. In medical settings, these screens can work for remote patient tracking. They let healthcare workers watch vitals live. The displays can connect with sensors, giving an easy interface to check and tweak patient care.
In industrial spots, touch screen OLED displays fit into factory dashboards. These show live data on machine work, output, and conditions. This helps operators make smart calls based on fresh info.
Custom software is often needed for tasks showing live data. In medicine, an OLED display might show ECG readings or other scan data as it happens. Tailored software can sharpen the display’s work, ensuring data shows clearly and without delay. This is key for right diagnosis and care.
In industrial uses like CNC (Computer Numerical Control) machine panels, custom software gives instant updates on status, settings, and issues. This lets operators watch performance and step in when needed. It cuts downtime and boosts efficiency.
Burn-in worries OLED displays, especially with still images up for ages. This matters in industrial layouts where data stays on screen long. To stop burn-in, use tricks like pixel-shifting and screen timeouts. Pixel-shifting nudges the image slightly to keep pixels from sticking to one thing too long. Screen timeouts can shut off the display after idle time.
Keeping things clean is huge in medical spots to avoid germs. When wiping OLED displays in sterile areas, use soft materials that won’t harm touch sensors. A microfiber cloth works best. It clears dust and prints without scratches. Also, stick to alcohol-free cleaners to avoid harsh chemicals on the screen.
OLED displays for Raspberry Pi might hit snags like flickering, slow input, or shaky power. Quick fixes include checking the power meets the screen’s needs, updating the Pi’s system to the latest, and ensuring no GPIO clashes. Sometimes, tweaking the refresh rate or size settings cuts flicker or lag. This keeps the display smooth and steady.
Off-the-shelf OLED displays might not fit some needs. Custom OLED displays help when odd sizes, IP-rated cases, or wide temp ranges are key. In medical spots where precision and trust matter, a custom size or temp-ready display can ensure top work.
Kadi Display, with over 20 years of know-how, offers top-grade industrial OLEDs for Raspberry Pi. They provide custom sizes, links like DSI and LVDS, and tough builds. Kadi Display’s Shenzhen R&D crew speeds up prototyping for medical and industrial uses, crafting solutions for unique sector needs.
Take your Raspberry Pi projects to the next level with OLED touch screens! Whether for medical imaging, industrial monitoring, or IoT applications, OLED displays offer superior clarity, durability, and responsiveness. Explore Kadi Display’s custom solutions today and experience the future of high-performance visual interfaces.